In all walks of life, I tend to gravitate towards minimalism. I don’t own many clothes. I’m mindful of new purchases; running shoes are the only minimalist rule exception. Considering I run two blogs ( Illness To Ultra and barefootrunreview.com), I have an excuse, right? 🙂
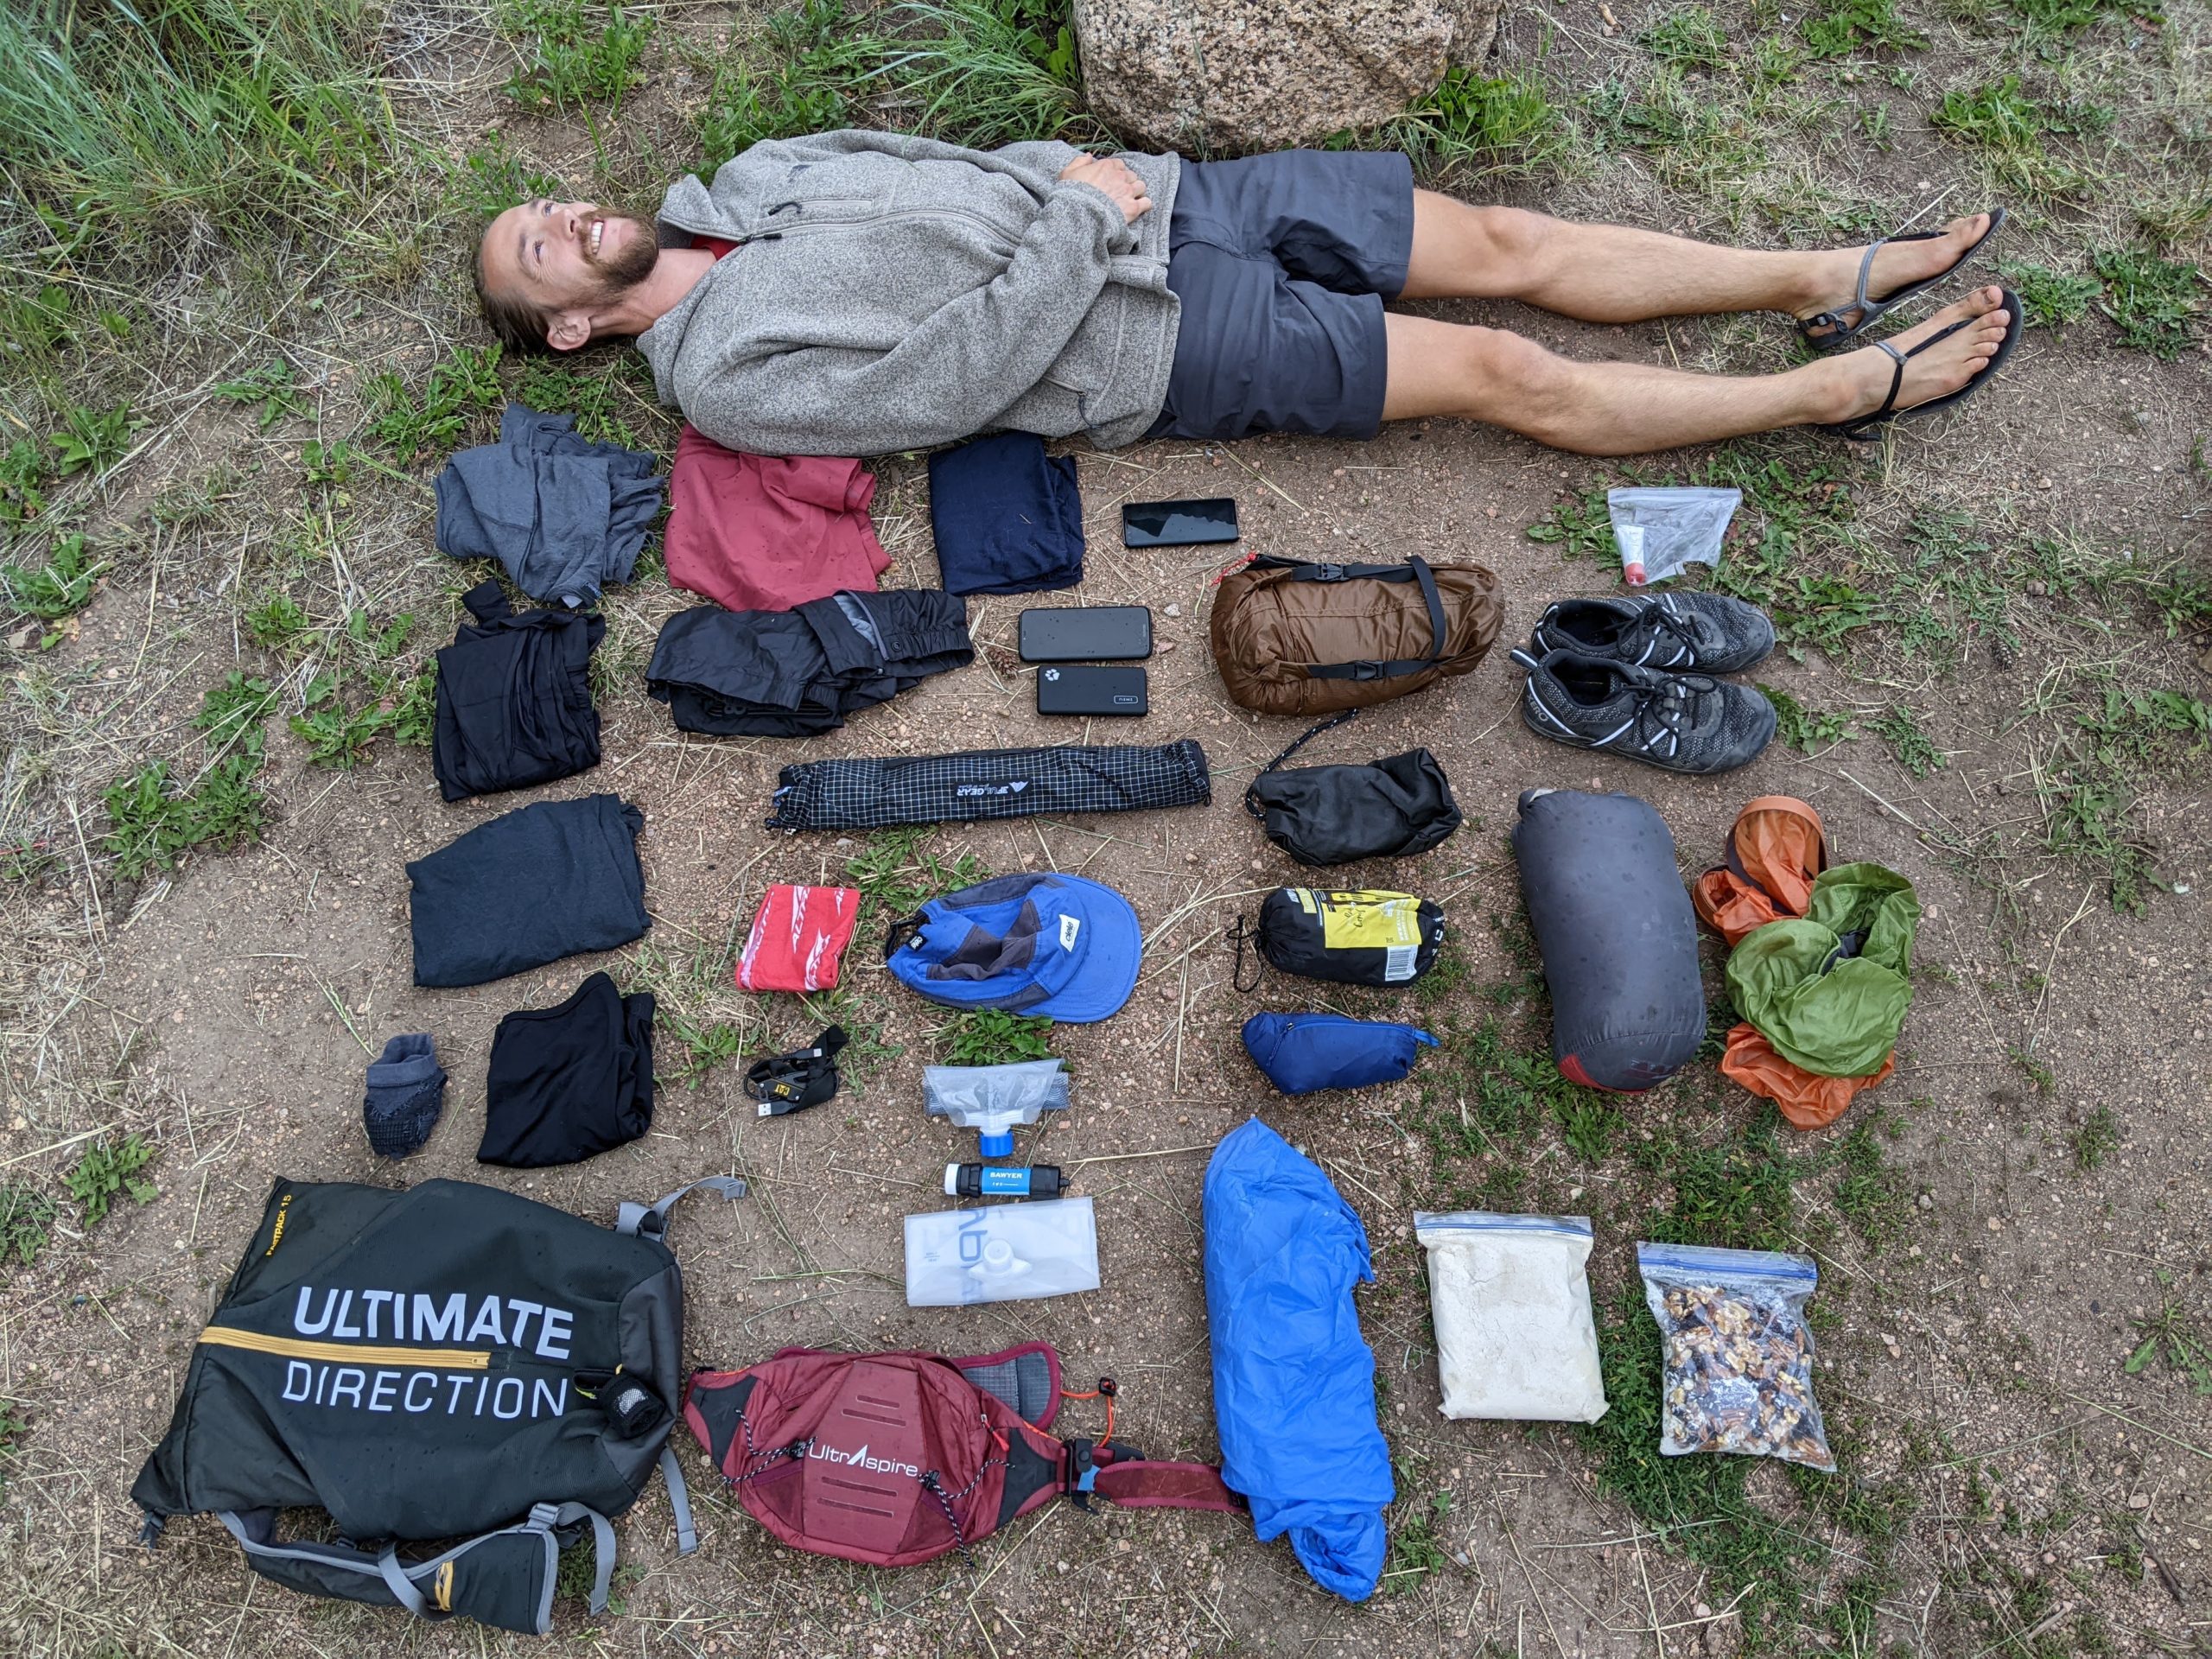
When I started planning to complete the Colorado Trail (CT), a 485-mile point-to-point thru hiking trail in Colorado, I knew I wanted to pack light. And I did! Especially compared to other thru hiker’s packs –and I want to share how and why I chose to go so light.
In this post, I will show you how I got my gear list down to ~5kg (11lbs) and take you through my decisions on important items like tents, sleeping bags, and underwear. I will also discuss the various safety concerns I’m sure many have regarding what gear is necessary for thru-hiking (or fastpacking) for miles in the wilderness.
Just wanna see the gear spreadsheet with all the weights and volume? Psssstt… click here.
Disclaimer: By clicking through the links on this page and purchasing the products, you’ll be helping me out. This is done because I receive a kickback from the sellers at no extra cost to you! I thank you so much for helping me continue with the website!
By no means is the following a prescription, and by no means am I a doctor. When making any changes in your life and using new products, ensure you discuss them with your doctor.
You can’t compare Apples and Oranges. And the same can be said about different forms of backpacking.
It’s important to note that I was supported throughout my CT attempt. In the populated areas, my awesome wife met me at trailheads to help resupply food and anything else I needed along the way. So essentially, I was fastpacking.
Having help like this is drastically different from a self-supported mission. Therefore, I knew going in that I could shed some weight because I would have a lifeline in the next 20-30 miles.
The only time where this wasn’t true was on the longer sections from the Silverton area to Durango and the San Juan mountain range [Segments 22- 28]. I would go days without resupply in these areas and had to be self-sufficient.
So this is a forewarning. If you rely solely on yourself during your journey, consider that my experience was slightly different than the average CT thru-hiker when putting together your gear list.
Because I had the idea of running on the CT, it immediately narrowed my pack choice.
Typically running packs, or vests, have slightly different straps and fit much more like an item of clothing than a backpack. And that’s why they’re called vests.
Capacity-wise, a few running vests stretch up into the 12L range. Bands like Salomon have their advanced skin range, but that’s not enough. UltraAspire makes the EPIC XT at 30L, but that’s more similar to a backpack. But by far, the most extensive range of running-specific large capacity packs is the Ultimate Direction Fastpack range.
Ultimately (get it?), I chose an older model from Ultimate Direction, the Fastpack 15 (weirdly, that’s a 20L bag.) But with the newer models, you’ll find options ranging from 20L up to 40Ll! Although let’s be honest, there’s no real chance of running with a 40L pack.
20L, is that enough?
I didn’t think so.
I made a spreadsheet to estimate the size of all the equipment I’d need, and with food, it came out at 19.8L. The issue is that the calculation did not include water. And you always need a bit of wiggle room for the odd addition that inevitably happens when packing.
So how did I come up with the extra couple of liters I needed for water?
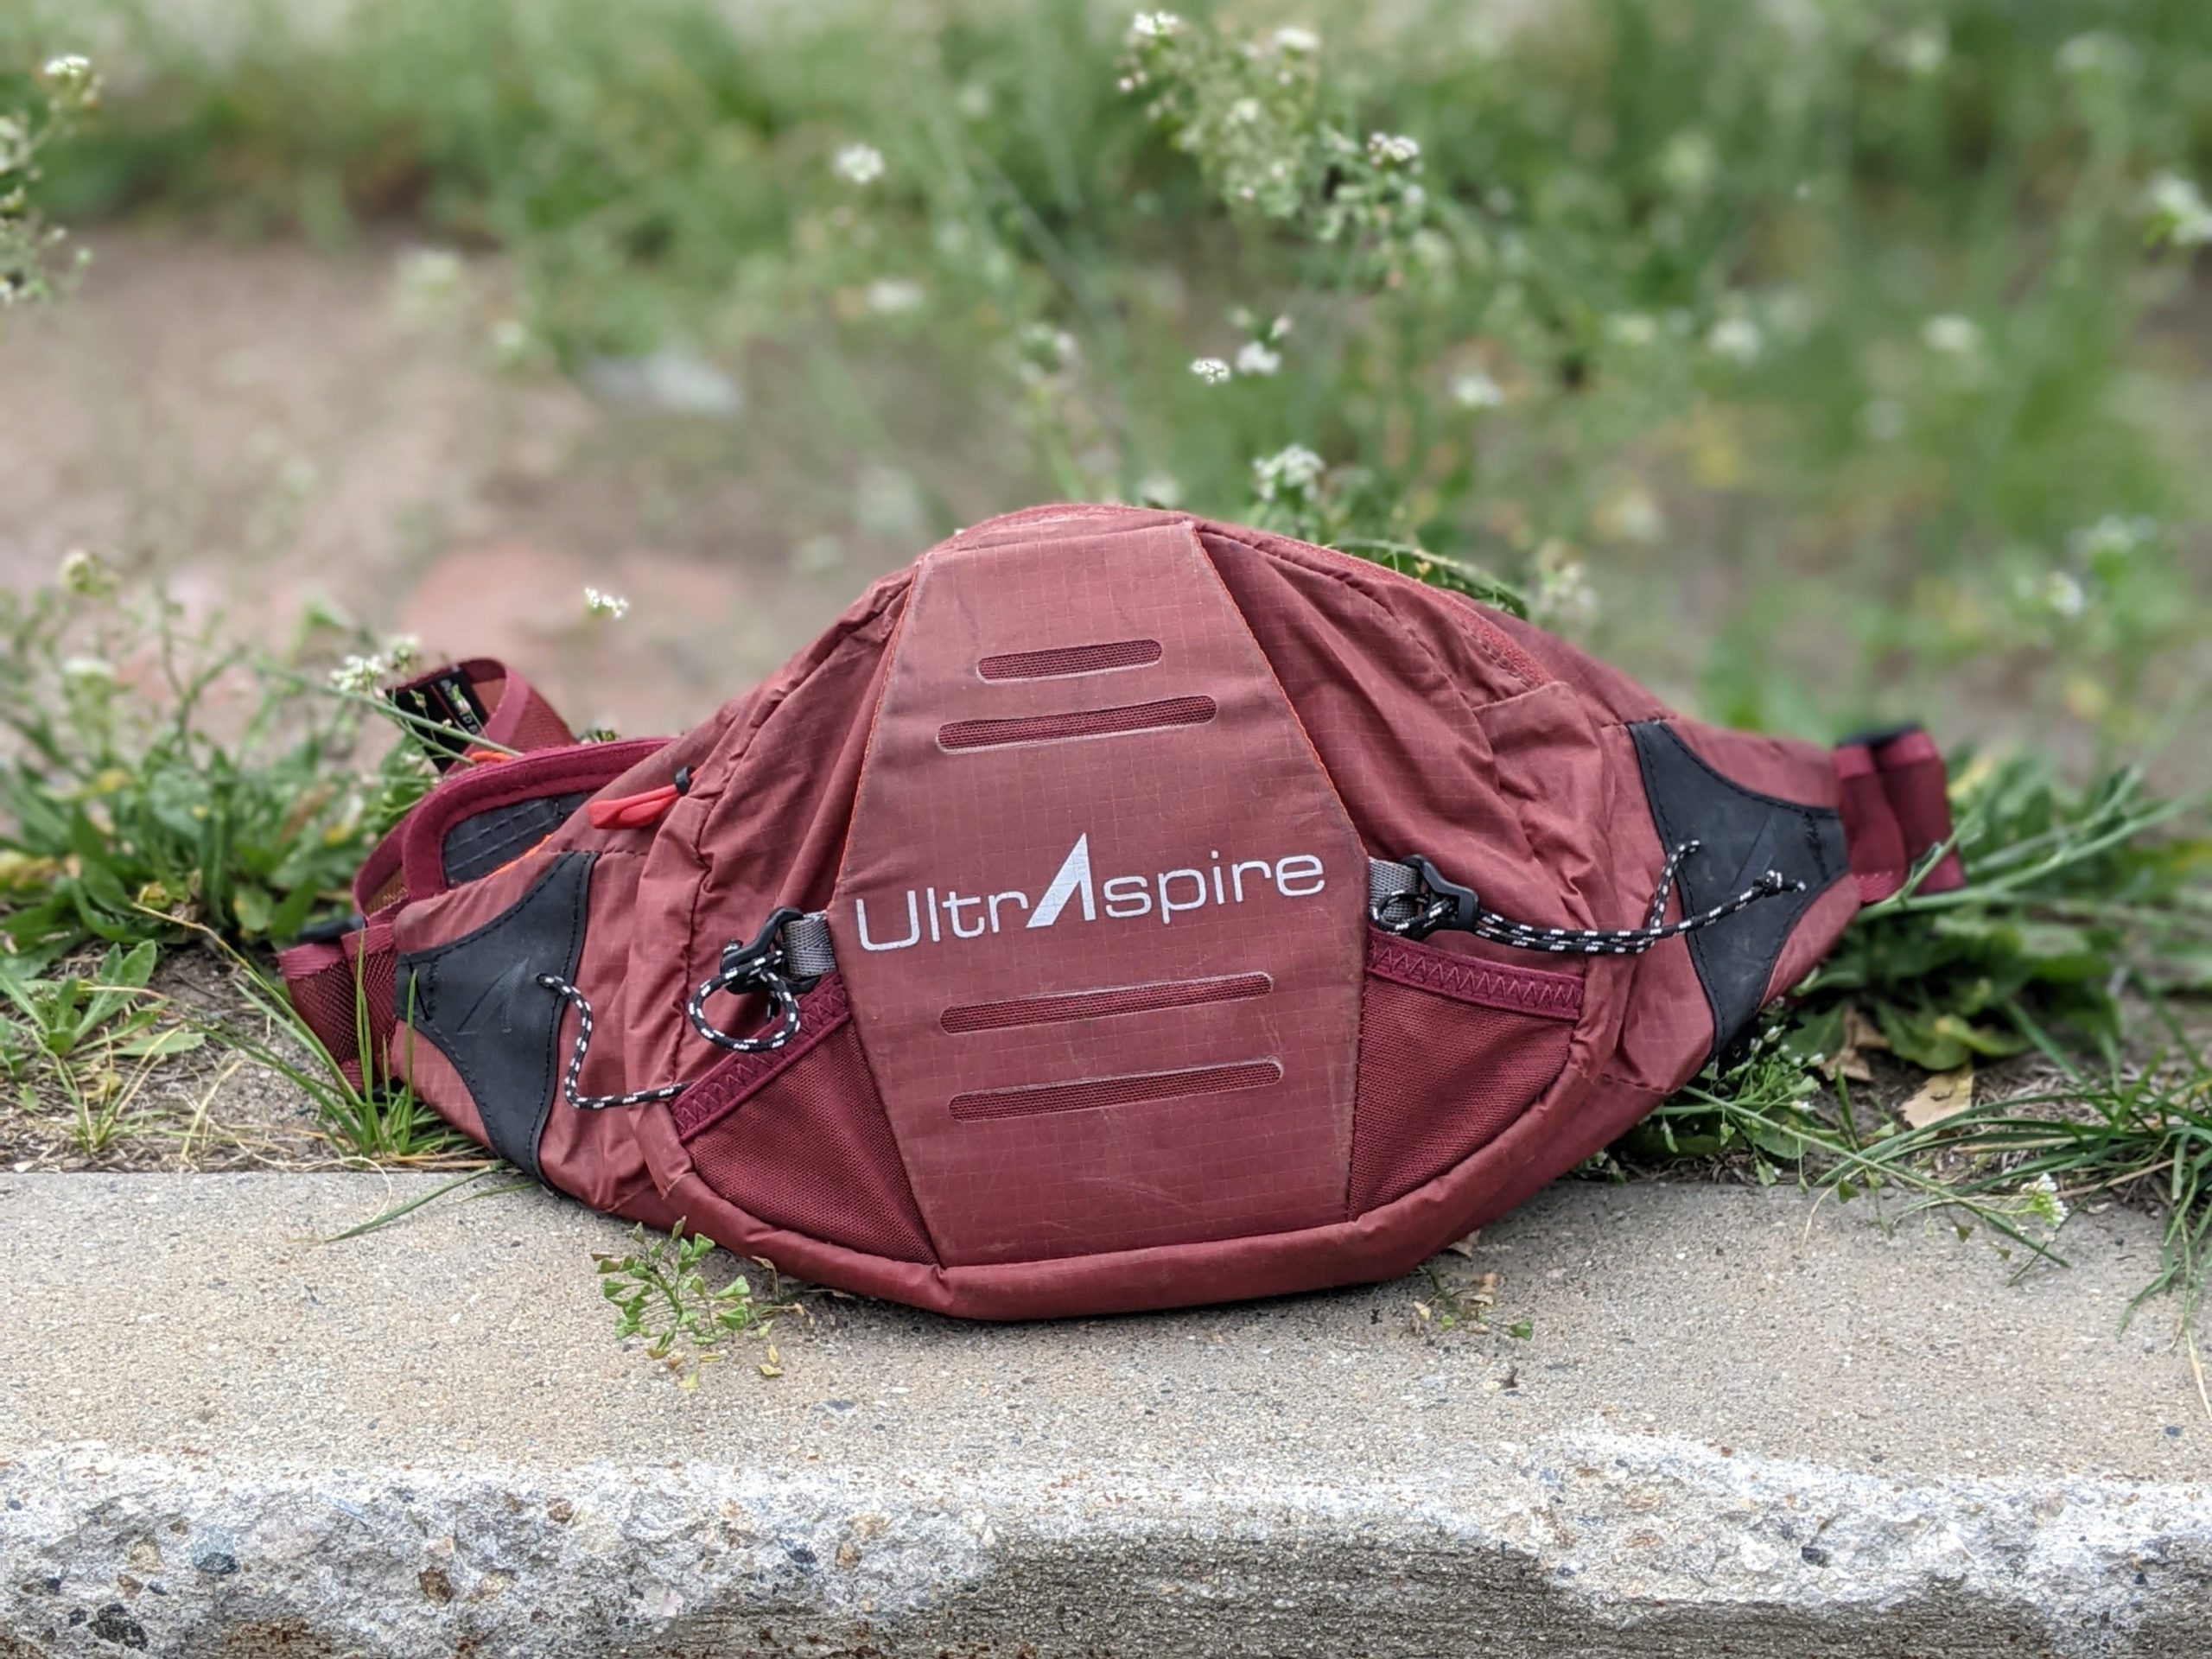
While researching packs, I discovered an interesting running belt concept from UltraAspire.

The UltraAspire Plexus is a high-capacity fanny pack (bum bag) that I believe could sit right below the smaller Fastpack 15.
I thought this fanny pack would allow me to carry water –often the heaviest component of backpacking– directly on the hips rather than on the shoulders. From the testing I’ve done, using a fanny pack like this is freeing, as long as it doesn’t jiggle.
With the Fastpack 15 and the Plexus combined, I’d have 25L of capacity, which I calculated should get me through 3 days without resupplies.
Pretty tiny, eh, but you’ll see why.
The sleeping gear is by far the most significant bulk of any backpacking trip—the tent, sleeping bag, sleeping mat, etc. So minimizing in this area is key to keeping your pack small and lightweight.
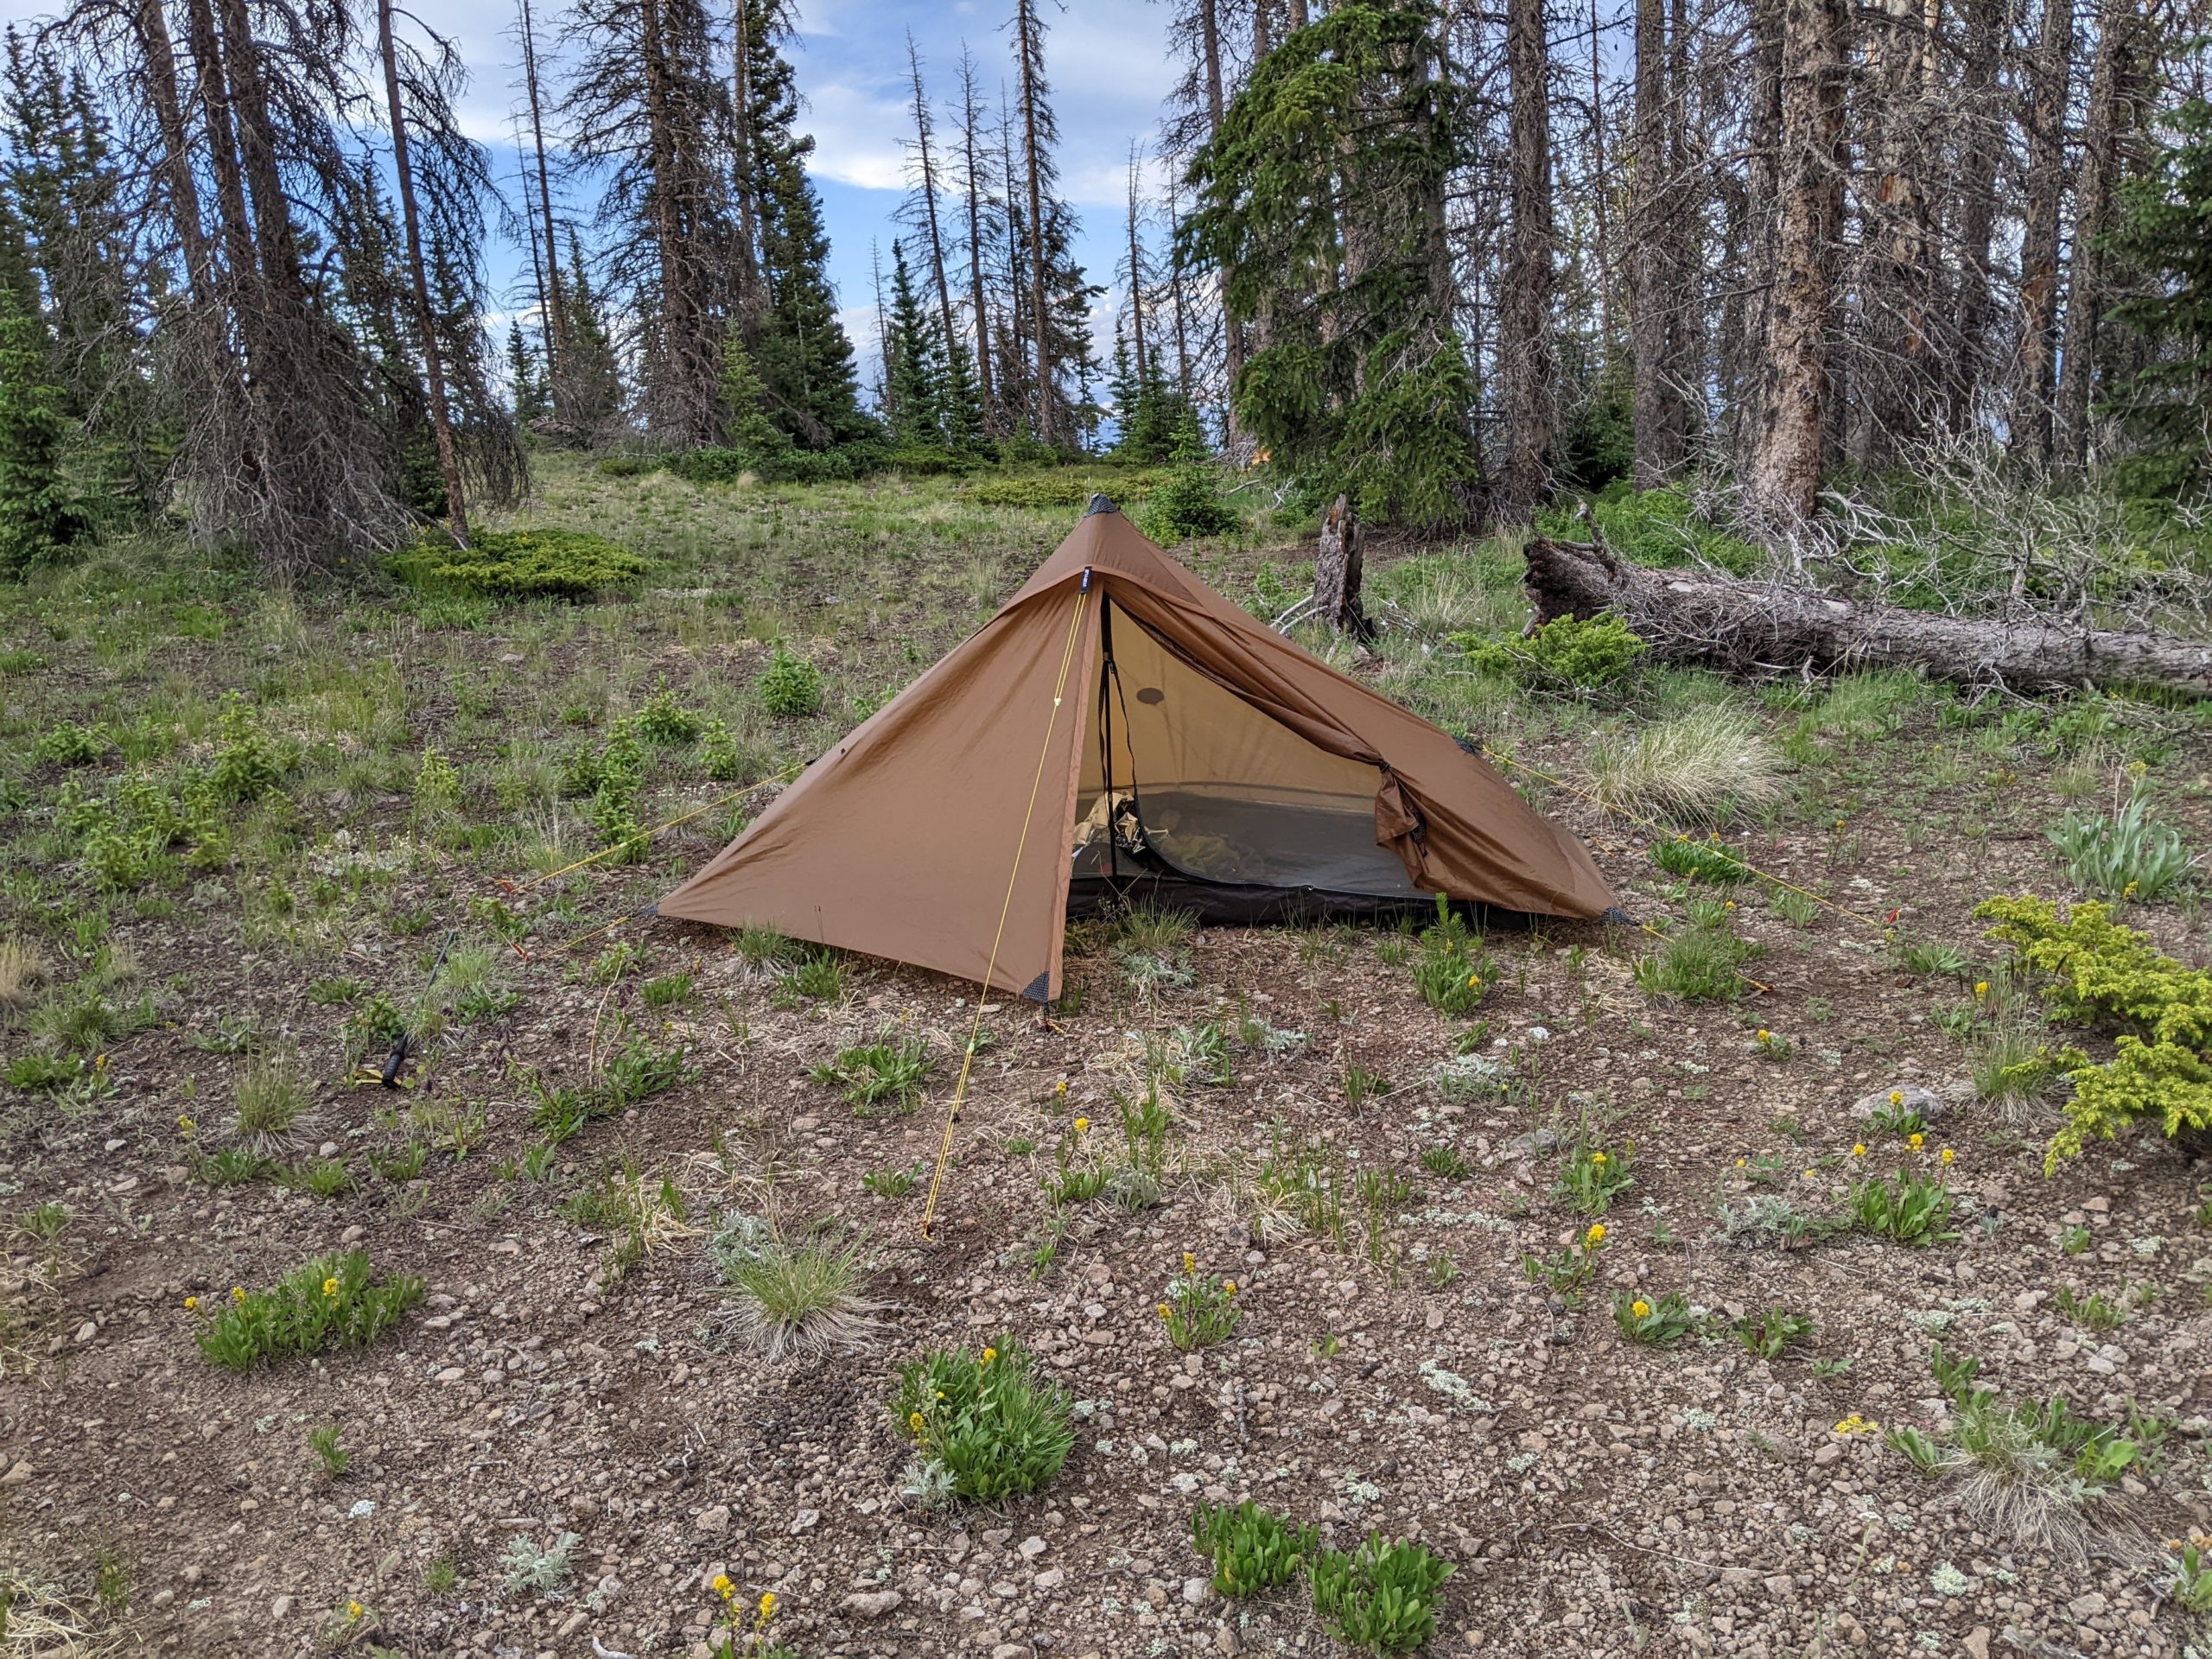
Tent (3F UL Lanshan Pro1 690g)
I looked around and around at various tents, tarps, and bivies, trying to find the optimal solution between protection and weight.
Ultimately, I decided a fly (inner) was essential because I couldn’t guarantee I’d be in mosquito-free areas when sleeping. So this immediately ruled out a simple tarp or the interestingly designed Six Moon Designs Gatewood Cape —a poncho that doubles as a tarp and is only 310g (11oz)!
Bivies were also a no-go because I needed good rain protection for the inevitable Colorado afternoon thunderstorms.

In the end, I went for the ultra-lightweight 3f UL Lanshan Pro 1.
For just 690g (24oz), you get a decent size 1-person tent with a fully enclosed inner.
You need 1 trekking pole of around 120-130cm to pitch the tent, but that was already part of my gear list, so I was carrying two poles at 126g each from 3f UL.
The tent itself is a single layer, so for humid environments, this could be a concern because of condensation. But for dry Colorado, I think it’d be a perfect fit.
After 6+ nights in my tent, I’m super happy with my decision. It’s small, lightweight, and maybe a little delicate, but that’s to be expected with such a lightweight option.
Sleeping bag (Vango down filled 700g)
Lucky for me, I’ve already made some long-distance adventure journeys, and I had a sleeping bag already fit for my purpose.
I bought my Vango down sleeping back about 10 years ago, and it’s still going strong-ish.
Coming in at 700g (25oz), it’s lightweight for a sleeping bag. But that comes at a cost.
It’s not super warm.
The extreme cold was one of the reasons I decided to end my 2 month Scandinavia/Baltic cycle tour back in 2015. When I tested all my gear in the mountains this time around, temperatures were dropping near freezing (even in the middle of Summer), and I still had to wear everything I had.
Luckily, during my thru-hike/run, temperatures were pretty favorable, and while I still had to wear every piece of clothing I had, I managed to get a decent amount of sleep each night. I did bring an emergency blanket, just in case, but I never had to use it.

Sleeping Mat (Klymit X-Frame 257g)
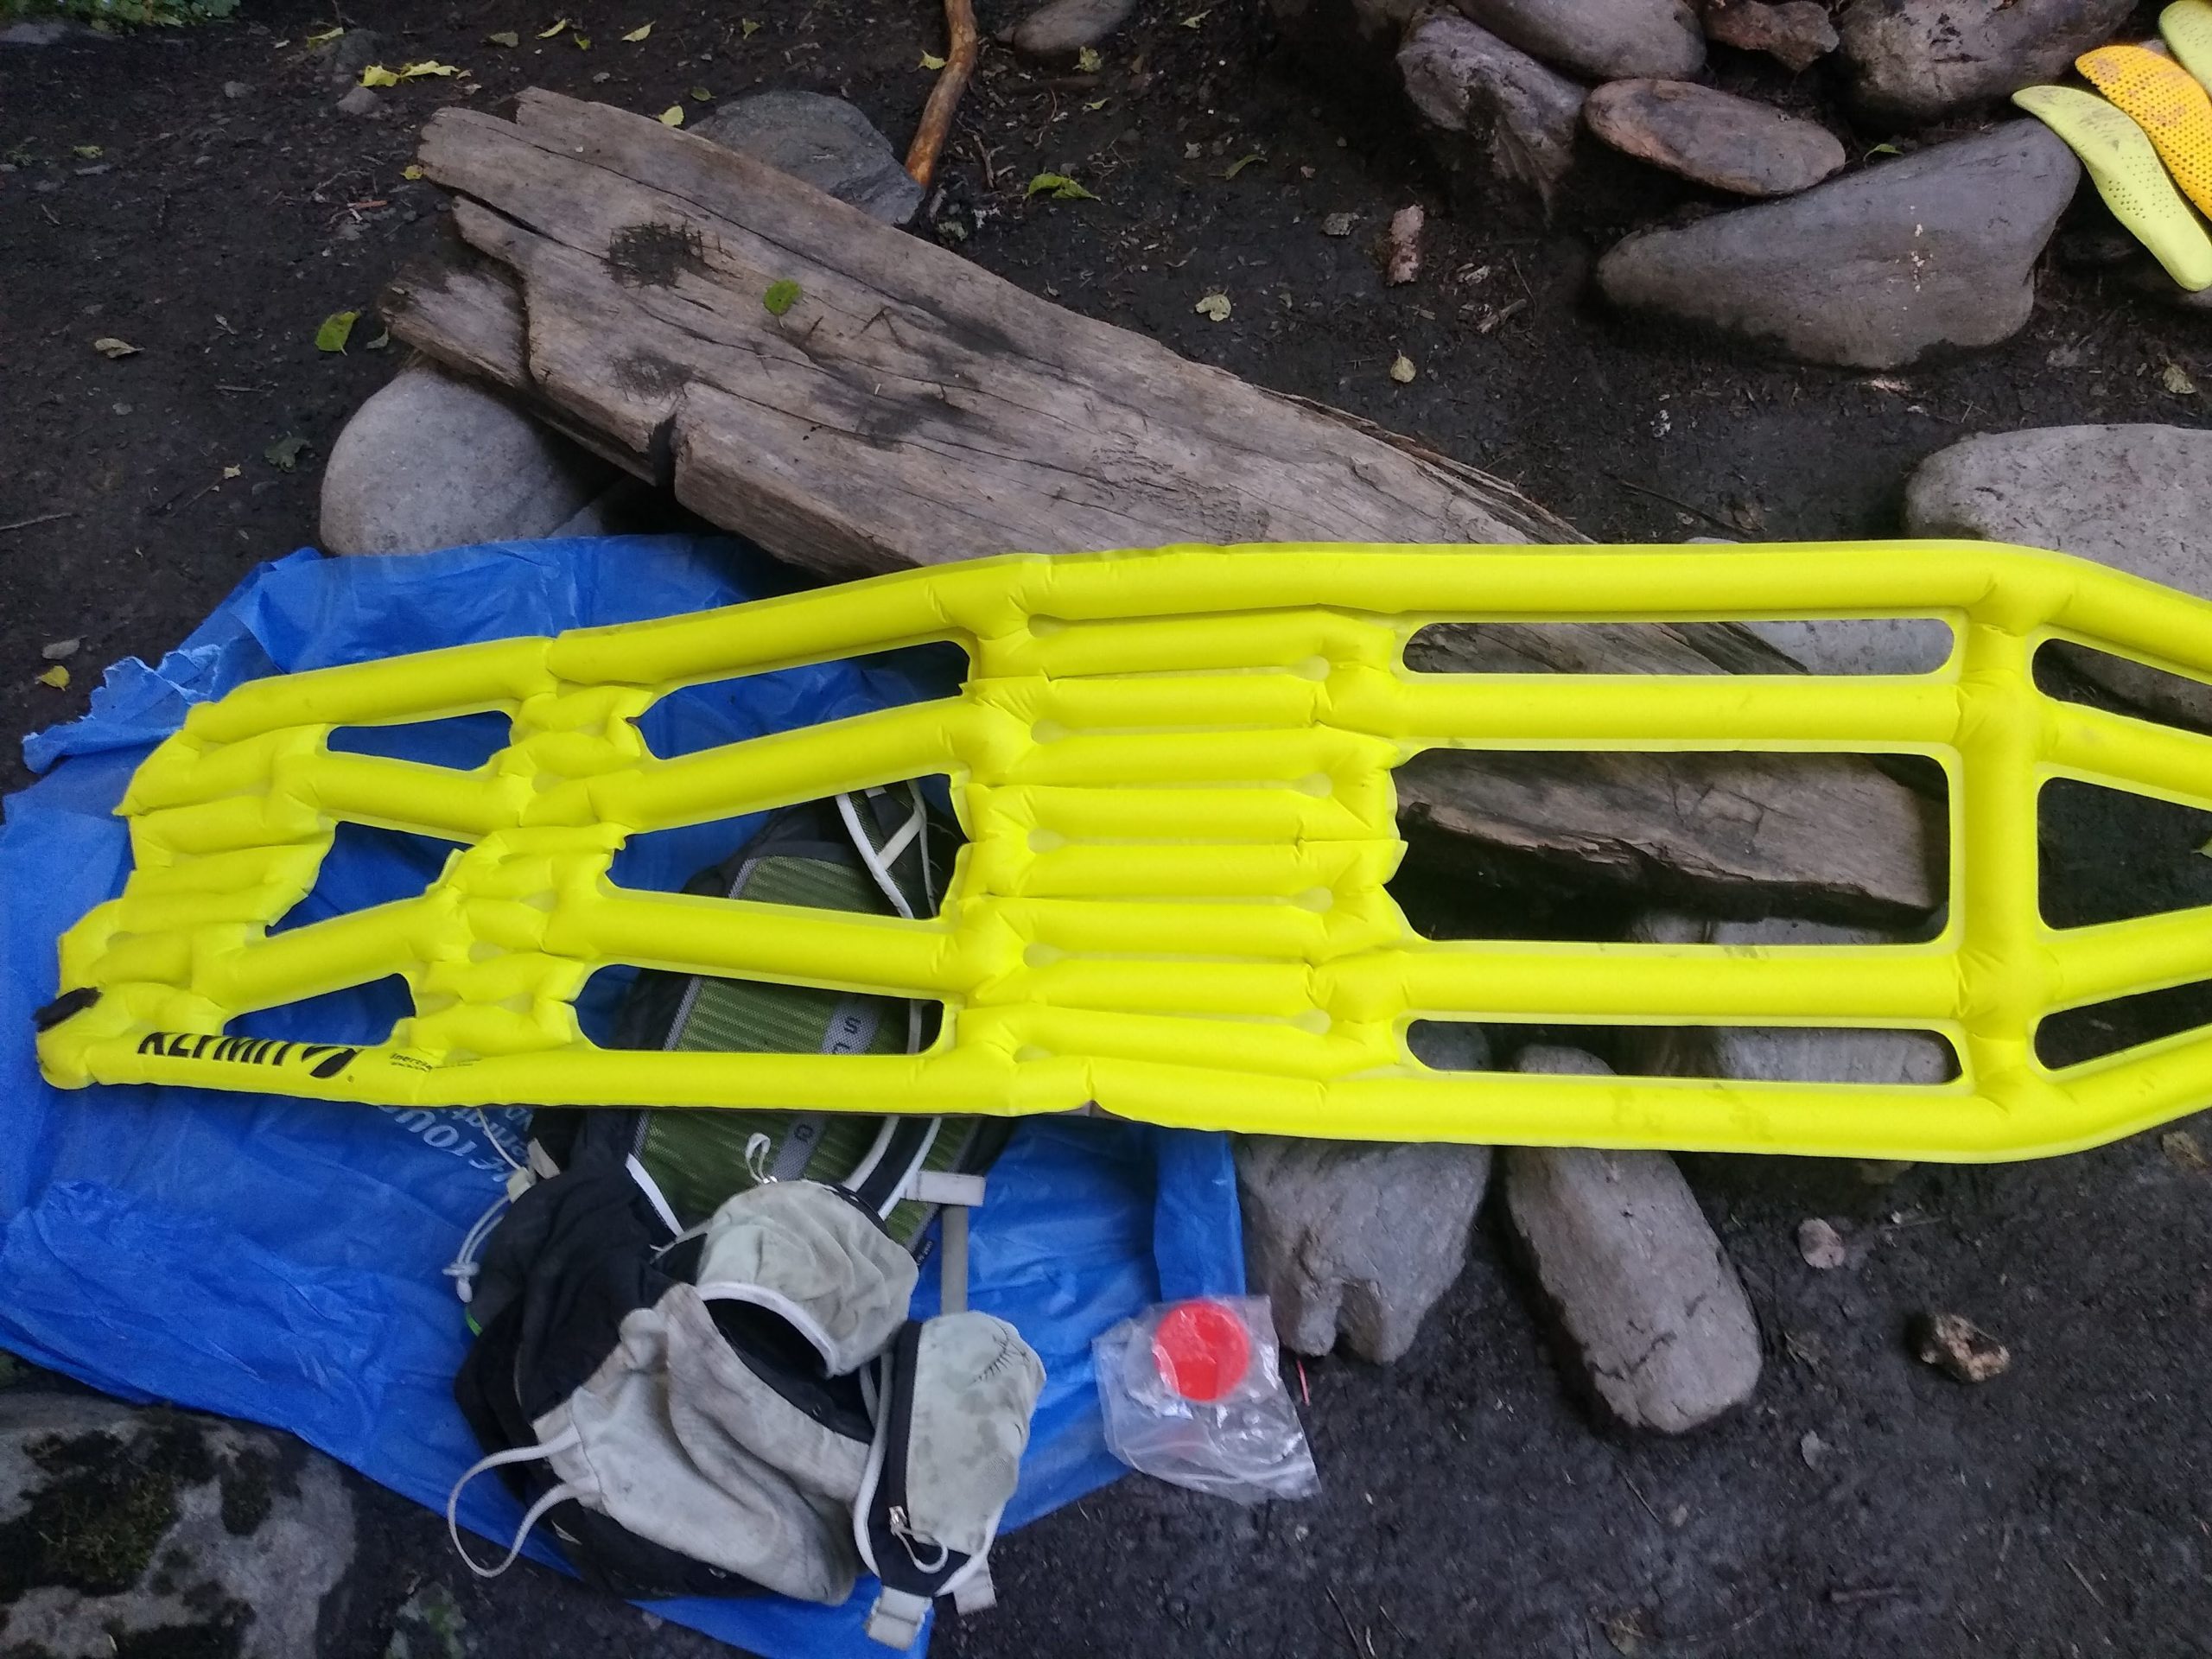
Another pretty extreme option in the sleeping department is the Klymit X-Frame sleeping mat.
It’s literally got holes in it!
With strategically placed air tubes around the head, shoulders, hips, and feet, this sleeping mat keeps the weight down by leaving out any padding around the legs and body.
There are drawbacks to this design.
If you stay in the correct spots on the mat, you can have a pretty comfortable night’s sleep. However, I have sometimes slipped into the gaps of the mat, which made for awkward maneuvering in the middle of the night to adjust. After many nights of practice, I learned to put the mat inside my sleeping bag, so there was no chance of it moving.
The other issue with the mat has to do with the temperature.
In addition to your sleeping bag, a sleeping mat is a piece of gear that can help keep you warm.
Some mats are purposely made to reflect heat and keep you warm, but with significant gaps in the mat, this one leaves you open to cold nights.
It’s a trade-off because this is likely the smallest and lightest mat on the market, and the only other option is to go without a mat. That’s not for me. So holey mat it was. As I said, I layered up on my clothes to get warm enough to sleep.
Most of my clothing decisions are based on what I already have in my wardrobe. So I won’t go into brands but just talk about generic items I took with me.
The key here is to reuse what you have and omit bringing what you don’t truly need when and where possible.
Everyday Running (worn during the day, so not included in the pack weight):
- Shorts
- Long-sleeved sun hoodie
- Underwear and toe socks
- Running cap
Packed Clothes:
- Long sleeved thermal
- Skins leggings
- Down Jacket
- Rain Pants
- Rain Poncho
- Windproof Jacket
- Gloves
- Buff
- Spare underwear and socks
- Emergency Blanket
Most July days in the Colorado mountains are warm and predictable. That is until after lunch when the storms roll in, and all bets are off.
So it’s important to pack warm gear and rain gear to fend off the hail, rain, and stormy conditions.
As mentioned, I doubled up and used most of my clothes and gear while sleeping to stay warm. For example, thermals, leggings, gloves, etc., were all worn to sleep in.
Depending on your sleeping bag, this might not be the case for you. My sleeping bag is a little underrated for cold weather at high elevations. So my clothes served multiple purposes because I carried a small and lightweight sleeping bag.
An interesting decision to many is the Poncho. I agree that in dire storm situations, a Poncho can be pretty impractical, but if I am in a bad enough storm, I will pitch a tent to get out of the elements.
In other situations, Ponchos are great! They’re super light, take up very little room, cover you and your backpack/gear, and are ultimately waterproof. They’re not breathable, but they are baggy enough to allow adequate airflow. If you’ve never tried it, do it next time you’re out!
Some would shun electronics on a long-distance hiking trip, citing that they have no place on the trail. One should always rely on physical mapping tools and books for leisure time.
I’m not one of those people.
For mapping, I carried two phones. I did this, so I had a redundant “just in case” option should one fail. And 1 of these phones doubles as a camera for the trip.
For any leisure time, I carried my old Kindle, which is super light and a small weight –plus, it helped to pass the time at night.
Safety-wise, I had a Petzel headtorch to hike in the dark should I need to.
I also tracked my journey using my Coros Pace 2 watch, which I was able to charge every time I met up with my support.
Lastly, I took a 10,000mAh battery, which is likely the heaviest electronic item and potentially one I could remove from the list. But to have the option to charge my devices, especially as they’re my sole mapping options, it’s an important safety decision.
A bear bag is one of the most important bags in this whole gear setup!
Colorado is known for its black bears, and we’d like to keep it that way. Using a Certified bear-safe bag, like the Ursak, ensures that bears cannot tear into your food, even if they find your stash, meaning they get no reward for their endeavor.
These bags are by no means lightweight, and that’s a testament to their strength. But they are a must for me on the CT.
Talking about must’s on the CT. The water filter. Although many of the water sources on the CT will be fresh snow and spring runoffs, it’s still hard to guarantee the source is free of pathogens. That’s why a water filter is advisable.
I used the mini Sawyer water filter with an adapter to connect two collapsible soft Platypus bottles, one to scoop the stream water and one for filtered water.
I also had 1 soft flask for easy drinking on the move.
Lastly, I carried a simple, lightweight CAT knife, which I found on the side of a road. And my titanium spork for scooping the Huel powdered food I’ll be carrying.
All the things that don’t fit into any other category.
- 20L + 4L Roll Sack
- Toothbrush head/Toothpaste
- Duct tape wrapped around a pen
- Toilet Roll
- Credit Card
- Cash
All these should be self-explanatory.
Although I will make a special mention of the duct tape, there have been many times duct tape has gotten me out of a situation, from fixing bicycle spokes to covering blisters. I wrap it around a pen to reduce its footprint in the bag and have a handy pen/pencil if I ever require it.
While others see the comfort in niche items like camping chairs, I see freedom in carrying less, moving swiftly and naturally.
Some of the choices I make for what I do not carry may not be plausible for others, but for me, logic and probability requirements come into play.
Cookware
I did not take any cookware; therefore, there was no boiling water, coffee, or hot food at the end of the day.
From a logical point of view, hot food and water do little to improve an overnight trip unless you’re in very cold conditions.
There’s a mental aspect to this that should be considered. I will not deny that hot coffee in the morning or a warm soup at the end of the day is a “nice” option. But I’m not going for nice. I’m going for optimal and efficient.
Comfort
In case you haven’t already guessed, I did not have much comfort… 🙂
That may sound funny, but I mean it in terms of no camp chair (yes, people use them), bulky camping mats, camp sandals, a pillow, hot coffee, etc.
All these items are luxuries that can make a trip comfortable but are not required. And because of that, I carried none of them.
First Aid
Many of you will be horrified at this one and may even call me out on it, but I carried no first aid items.
The closest I had to anything “aid” related was duct tape, which can take the place of many minor injury first aid items like bandaids or bandages.
Otherwise, for the most part, I was always less than 20 miles from safety, i.e., a road of some type. It’s not ideal, but anything a first aid kit can solve can be mentally dealt with until I can get to safety.
For 485+ miles of the Colorado Trail, I packed and carried 5364g (11 lbs and 13.21 oz) without food. Is it possible to go so lightweight? Yes. Does it make for a comfortable experience? No. But that’s not what fastpacking is about.
I’d encourage everyone to try and minimize their pack weight. Every extra ounce is a drag and takes effort to lug over the mountains.
Bring your stove along if a morning coffee is essential to your happiness on the trail. Obviously, work to your comfort level. But remember that comfort can also come from the freedom of lightweight natural movement.
If you’d like to talk gear, give me a shout. I’m happy to chat!
